

As winter casts its icy spell and blankets the outdoor world in frost, the eager gardener need not wait in idleness for the warmer days of spring. Instead, you can embark on a gardening adventure right in the comfort of your home by indoor plant seeds. This practice not only offers a head start on the growing season but also allows you to nurture your plants through their tender early stages. For those living in cold climates where the threat of frost lingers longer, indoor seed starting is nothing short of a horticultural lifesaver.
In this comprehensive guide, we’ll explore the fascinating world of indoor seed starting, from understanding the benefits of this practice to choosing the right seeds, creating the perfect indoor environment, selecting the essential tools and supplies, and providing the care and attention your seedlings need to flourish. So, if you’re ready to dive into the world of early gardening and unlock the secrets of successful indoor seed starting, let’s get started.
The Advantages of Starting Seeds Indoors
Early Planting: The Gardener’s Advantage
The allure of early planting is a siren song to gardeners in cold climates. Starting seeds indoors grants you a precious head start on the growing season. Instead of waiting for the last frost to recede, you can have young, robust seedlings ready to take root in your garden beds as soon as the weather permits. This means more time for your plants to produce, resulting in a longer harvest period and potentially higher yields.
Healthier, Stronger Seedlings
Seedlings started indoors often grow stronger and healthier than those planted directly outdoors. Indoors, you can meticulously control environmental conditions, providing your young plants with the optimal levels of light, temperature, and humidity. This care and attention result in sturdier seedlings that are better equipped to withstand the challenges of outdoor life.
Varied Plant Selection
Indoor seed starting opens up a world of possibilities when it comes to plant selection. You can experiment with a broader range of plant varieties and species, including those that may be less suited to direct outdoor sowing in your region. This diversity can add a unique and exciting dimension to your garden.
The Timing of Starting Seeds Indoors
The Last Frost Date Connection
Timing is everything when it comes to indoor seed starting. The key to success lies in understanding your region’s average last frost date in spring. This date serves as your guide, determining when it’s safe to transplant your indoor-grown seedlings outdoors.
To calculate your ideal indoor seed starting time:
- Identify your region’s average last frost date. You can find this information from local agricultural extension services or online gardening resources.
- Count backward from the last frost date to determine the best time to start your seeds indoors. This timing varies depending on the plant variety, but a common range is 6-8 weeks before the last expected frost.
A Planting Schedule for Cold Climates

For those in cold climates, where winters can be especially harsh, starting seeds indoors is not just an option; it’s a necessity. Here’s a simplified planting schedule to help you get started.
- November to December: Begin with seeds that require a longer indoor growth period, such as tomatoes, peppers, and eggplants.
- January to February: Transition to seeds with a shorter indoor growth period, like herbs and certain annual flowers.
- Late February to March: Start warm-season crops like cucumbers and melons, ensuring they have enough time to mature before transplanting.
Choosing the Right Seeds to Start Indoors
Indoor-Worthy Plant Varieties
Not all plants are created equal when it comes to indoor seed starting. Some thrive under the controlled conditions you can provide indoors, while others are best suited for direct outdoor sowing. Here are some plant categories that generally fare well with indoor starting:
- Warm-Season Vegetables: Tomatoes, peppers, eggplants, and other warm-season crops benefit from early indoor starting.
- Herbs: Culinary herbs like basil, parsley, and cilantro often do exceptionally well when started indoors.
- Flowers: Many annual and perennial flowers can be started indoors for a colorful and vibrant garden.
The Charm of Tomatoes, Peppers, and Eggplants
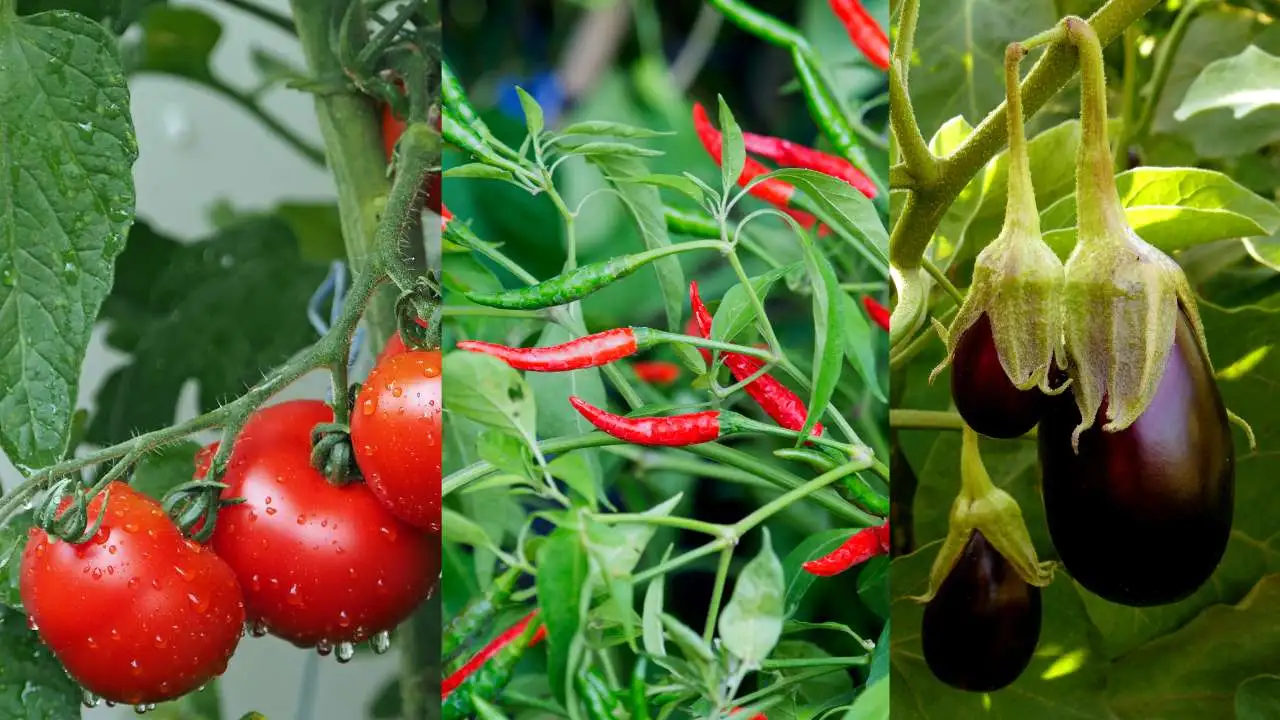
Among the most beloved plants for indoor seed starting are tomatoes, peppers, and eggplants. These warm-season vegetables require a longer growing season than the typical cold-climate climate allows, making indoor starting essential for a fruitful harvest.
Tomatoes: Starting tomato seeds indoors allows you to choose from a vast array of tomato varieties, from sweet cherries to beefsteak giants. Indoor cultivation ensures your tomatoes are ready to flourish outdoors when the time is right.
Peppers: Whether you prefer sweet bell peppers or spicy chili peppers, growing these plants from seeds indoors gives you a head start on producing these flavorful additions to your culinary repertoire.
Eggplants: Eggplants are another warm-season favorite that benefits from early indoor starting. These glossy, purple beauties add depth and flavor to a variety of dishes.
The Indoor Environment: Creating a Seedling Haven
Temperature: The Goldilocks Zone
The temperature in which you grow your seedlings plays a pivotal role in their success. Most seedlings thrive in daytime temperatures between 65°F to 75°F (18°C to 24°C) and nighttime temperatures around 60°F (15°C). Maintaining a consistent temperature is crucial to preventing stress and ensuring healthy growth.
Humidity: The Right Balance
Maintaining proper humidity levels is another essential factor in the indoor seed starting equation. Young seedlings are more vulnerable to drying out, so it’s important to create a humid microenvironment around them. You can achieve this by using humidity domes or covers for your seed trays or by misting the seedlings regularly.
Lighting: The Sunshine Substitute
Indoor seedlings crave light, and providing them with the right amount and quality of light is critical. While a sunny windowsill can work for some plants, supplemental lighting is often necessary, especially during the dark days of winter. Fluorescent or LED grow lights are excellent options for ensuring your seedlings receive the light they need.
Location: The Seedling Sanctuary
Selecting the right location for your indoor seedlings is equally important. Choose a space that receives adequate light and maintains a consistent temperature. Avoid drafty areas or places with extreme temperature fluctuations.
Essential Tools and Supplies for Indoor Seed Starting
The Prerequisites
To embark on your indoor seed starting journey, you’ll need some essential tools and supplies:
- Seed Trays or Containers: These hold your growing medium and provide a space for your seeds to germinate and grow.
- Growing Medium: A high-quality seed-starting mix is essential. It’s typically soilless, ensuring good drainage and preventing soilborne diseases.
- Seeds: Choose high-quality seeds from reputable sources. Read seed packets for essential information on planting depth, spacing, and germination times.
- Labels: Labeling your trays or pots helps you identify the plants as they grow. Use waterproof labels or markers to avoid fading.
- Watering Equipment: A gentle watering can or spray bottle is useful for maintaining proper moisture levels without disturbing delicate seedlings.
Additional Supplies
Depending on your preferences and gardening style, you may also want to consider these additional supplies:
- Heat Mats: These provide consistent bottom heat, aiding in germination, especially for warm-season crops.
- Humidity Domes or Covers: These help create a more humid environment around your seedlings.
- Supplemental Lighting: If natural light is insufficient, fluorescent or LED grow lights are excellent options.
- Fertilizer: While not typically needed at the seedling stage, some gardeners choose to use diluted, balanced fertilizers.
Preparing Your Seeds for Planting
Quality Seeds: The Starting Point
Starting with high-quality seeds is essential for success. Select seeds from reputable sources known for their viability and quality. Avoid using old or improperly stored seeds, as their germination rates may be lower.
Pre-Treatment Considerations
Some seeds benefit from pre-treatment before planting. This can include methods like soaking, scarification, and stratification:
- Soaking: Soaking seeds in water for a specified period can help break dormancy and improve germination rates.
- Scarification: Some seeds have tough outer coats that need to be scratched or nicked to allow moisture to penetrate and initiate germination.
- Stratification: Certain seeds, especially those from cold-climate plants, require a period of cold stratification to simulate winter conditions. This can be achieved by refrigerating the seeds for a specific duration.
Reading Seed Packets
Seed packets are a treasure trove of information for gardeners. Each packet provides essential details about the plant variety, including:
- Planting Depth: How deep to sow the seeds in your trays or containers.
- Spacing: The recommended distance between seeds or seedlings.
- Germination Time: The average number of days it takes for seeds to sprout.
- Planting Instructions: Specific guidelines for the plant variety, including any unique requirements.
Planting Your Seeds: The Sow, Grow, and Thrive Process
Selecting the Right Containers
Your choice of containers plays a crucial role in the health and development of your seedlings. Consider using seed trays, peat pots, or biodegradable containers. These options allow for easy transplanting without disturbing the fragile root systems of your seedlings.
Sowing Seeds: The Art of Precision
When sowing your seeds, follow these steps for success:
- Prepare the Container: Fill your seed tray or pots with the seed-starting mix, leaving a little space at the top.
- Create Furrows or Holes: Depending on the seed size, make furrows or holes in the growing medium to the recommended depth. Use a pencil or dibber for accuracy.
- Sow the Seeds: Place the seeds in the furrows or holes, following the spacing guidelines on the seed packet. Avoid overcrowding.
- Cover and Water: Gently cover the seeds with the growing medium and water them carefully using a misting spray or a gentle stream of water.
- Label Your Containers: Clearly label each tray or pot with the plant variety and the date of planting.
Maintaining Proper Moisture
Proper moisture levels are crucial during the germination phase. Keep the growing medium consistently moist but not waterlogged. A spray bottle or a gentle watering can help you maintain the right balance.
Nurturing Your Seedlings: Care and Attention for Healthy Growth
Temperature Control
Maintaining a consistent temperature is vital for the healthy growth of your seedlings. Consider using heating mats to provide bottom warmth. Keep your seedlings within the temperature range recommended for the specific plant variety.
Lighting Requirements
Light is the lifeblood of your indoor seedlings. If natural light is insufficient, supplement it with fluorescent or LED grow lights. Position the lights a few inches above the seedlings and adjust the height as the plants grow. Provide 12-16 hours of light daily to simulate daylight hours.
Thinning and Transplanting
As your seedlings grow, they may become crowded. To ensure healthy development, thin out weaker seedlings, leaving the strongest and healthiest ones. When your seedlings have developed several true leaves and are large enough to handle, they are ready for transplanting into larger pots or directly into your garden beds.
Fertilizing Your Seedlings
While most seedlings do not require fertilization during their early growth stages, you can choose to use a diluted, balanced fertilizer if your seed-starting mix is nutrient-poor. Always follow the recommended dilution instructions, as over-fertilizing can harm young plants.
Transplanting Seedlings to the Garden: The Outdoor Transition
Hardening Off: Preparing for the Great Outdoors
Before transplanting your indoor-grown seedlings into your garden, they need to be acclimated to the outdoor environment. This process is known as hardening off and typically takes place over a 7-10 day period.
Here’s how to harden off your seedlings:
- Gradual Exposure: Start by placing your seedlings outdoors in a sheltered, shaded area for a few hours each day.
- Increase Exposure: Gradually increase the amount of time your seedlings spend outdoors and expose them to more sunlight.
- Protect from Extreme Conditions: Be mindful of temperature fluctuations, wind, and direct sunlight during this process. Protect your seedlings as needed.
Transplanting Guidelines
When transplanting your seedlings into your garden beds, follow these guidelines for a smooth transition:
- Choose the Right Time: Ensure the threat of frost has passed before transplanting. Refer to your region’s average last frost date for guidance.
- Prepare the Soil: Prepare the planting area by amending the soil with compost or organic matter. Ensure proper drainage.
- Handle Seedlings Gently: Transplant your seedlings carefully, disturbing the roots as little as possible. Use a dibber or a small trowel to create planting holes.
- Plant at the Right Depth: Plant your seedlings at the same depth they were in their original containers. Firm the soil around the roots to eliminate air pockets.
- Water Thoroughly: After transplanting, water your seedlings thoroughly to settle the soil and hydrate the roots.
- Monitor and Protect: Keep a close eye on your newly transplanted seedlings. Provide shade during hot afternoons, and protect them from pests as needed.
Troubleshooting and Common Challenges
Damping-Off: A Fungal Foe
Damping-off is a common issue in seedlings, particularly in seed trays with high humidity levels. To prevent this fungal disease, ensure proper ventilation and avoid overwatering. Consider using a fan to improve air circulation.
Leggy Seedlings: Reaching for the Light
Leggy seedlings appear tall and spindly, with long stems and weak growth. This condition typically results from insufficient light. To prevent legginess, provide adequate lighting, and position your light source close to the seedlings.
Insufficient Lighting: Shedding Light on the Issue
If your seedlings are not receiving enough light, they may appear pale or weak, with elongated stems. Supplemental lighting with fluorescent or LED grow lights can help address this issue and ensure healthy growth.
Pruning Dos and Don’ts: Common Mistakes to Avoid
Dos
- Do prune overcrowded seedlings: Thin out weaker seedlings to allow the strongest ones more room to grow.
- >Do maintain consistent temperature and humidity: Providing the right environmental conditions is key to successful indoor seed starting.
- Do use proper labeling: Clear and accurate labeling helps you keep track of your seedlings’ progress.
- Do harden off your seedlings: Gradually acclimate them to outdoor conditions before transplanting.
Don’ts
- Don’t overwater: Overwatering can lead to fungal diseases and stress seedlings.
- Don’t neglect proper lighting: Insufficient light can result in weak, leggy seedlings.
- Don’t skip hardening off: Transplanting directly from indoors to the garden without hardening off can shock and harm your seedlings.
- Don’t use old or poor-quality seeds: Starting with high-quality seeds is essential for successful indoor seed starting.
Conclusion
Indoor seed starting is a gardener’s secret weapon against the cold grip of winter and the limitations of a short growing season. By mastering the art and science of this practice, you gain the power to extend your gardening horizons, experiment with a diverse range of plant varieties, and enjoy an abundant harvest that stretches well into the warm days of spring and summer.
From selecting the right seeds and creating the perfect indoor environment to providing the care and attention your seedlings need to thrive, this guide has covered the essential steps to ensure your indoor seed starting journey is a success. So, embrace the opportunity to start early, nurture your seeds into healthy seedlings, and watch as your indoor efforts bloom into a thriving and productive outdoor garden. With the right knowledge and tools, you’re well on your way to a rewarding gardening season ahead. Happy gardening!